This is an advanced feature. You mush have an admin account access to perform this operation.
With MixCertificate, you can use your own domain (for example, certificate.yourcompany.com) for hosting and verifying certificates. This guide will walk you through the complete setup.
What You’ll Get
-
Certificates hosted on your own branded subdomain
-
QR codes that redirect to your domain
-
A more professional and trustworthy experience for recipients
Before You Start
Please ensure:
-
You own the domain you want to use
-
You have access to your domain’s DNS settings
-
You are logged in as an Admin in your MixCertificate business account.
Step 1: Add a DNS Record (CNAME)
Login to your domain provider (such as GoDaddy, Namecheap, or Cloudflare).
Add a new CNAME record with the following details:
| Setting | Value |
|---|---|
| Type | CNAME |
| Host / Name | certificate |
| Points to / Value | www.mixcertificate.com |
Example
If your domain is yourdomain.com, this will create:
certificate.yourdomain.com
⏳ DNS changes may take a few minutes to a few hours to apply.
Step 2: Check Login Page (reCAPTCHA)
Once DNS is active, open your new subdomain in a browser:
https://certificate.yourdomain.com
If you see a reCAPTCHA error
“This site is not added for reCAPTCHA”
Please contact your technical team or MixCertificate support to add your subdomain to Google reCAPTCHA.
This is required for secure login and form protection.
Mail: Inform your point of contact/sales once done. Or mail [email protected] with your query.
Step 3: Platform Configuration (Handled by MixCertificate)
The following steps are handled internally by MixCertificate:
-
Adding your subdomain to the hosting platform
-
Issuing and enabling HTTPS (SSL certificate)
No action is required from your side for this step.
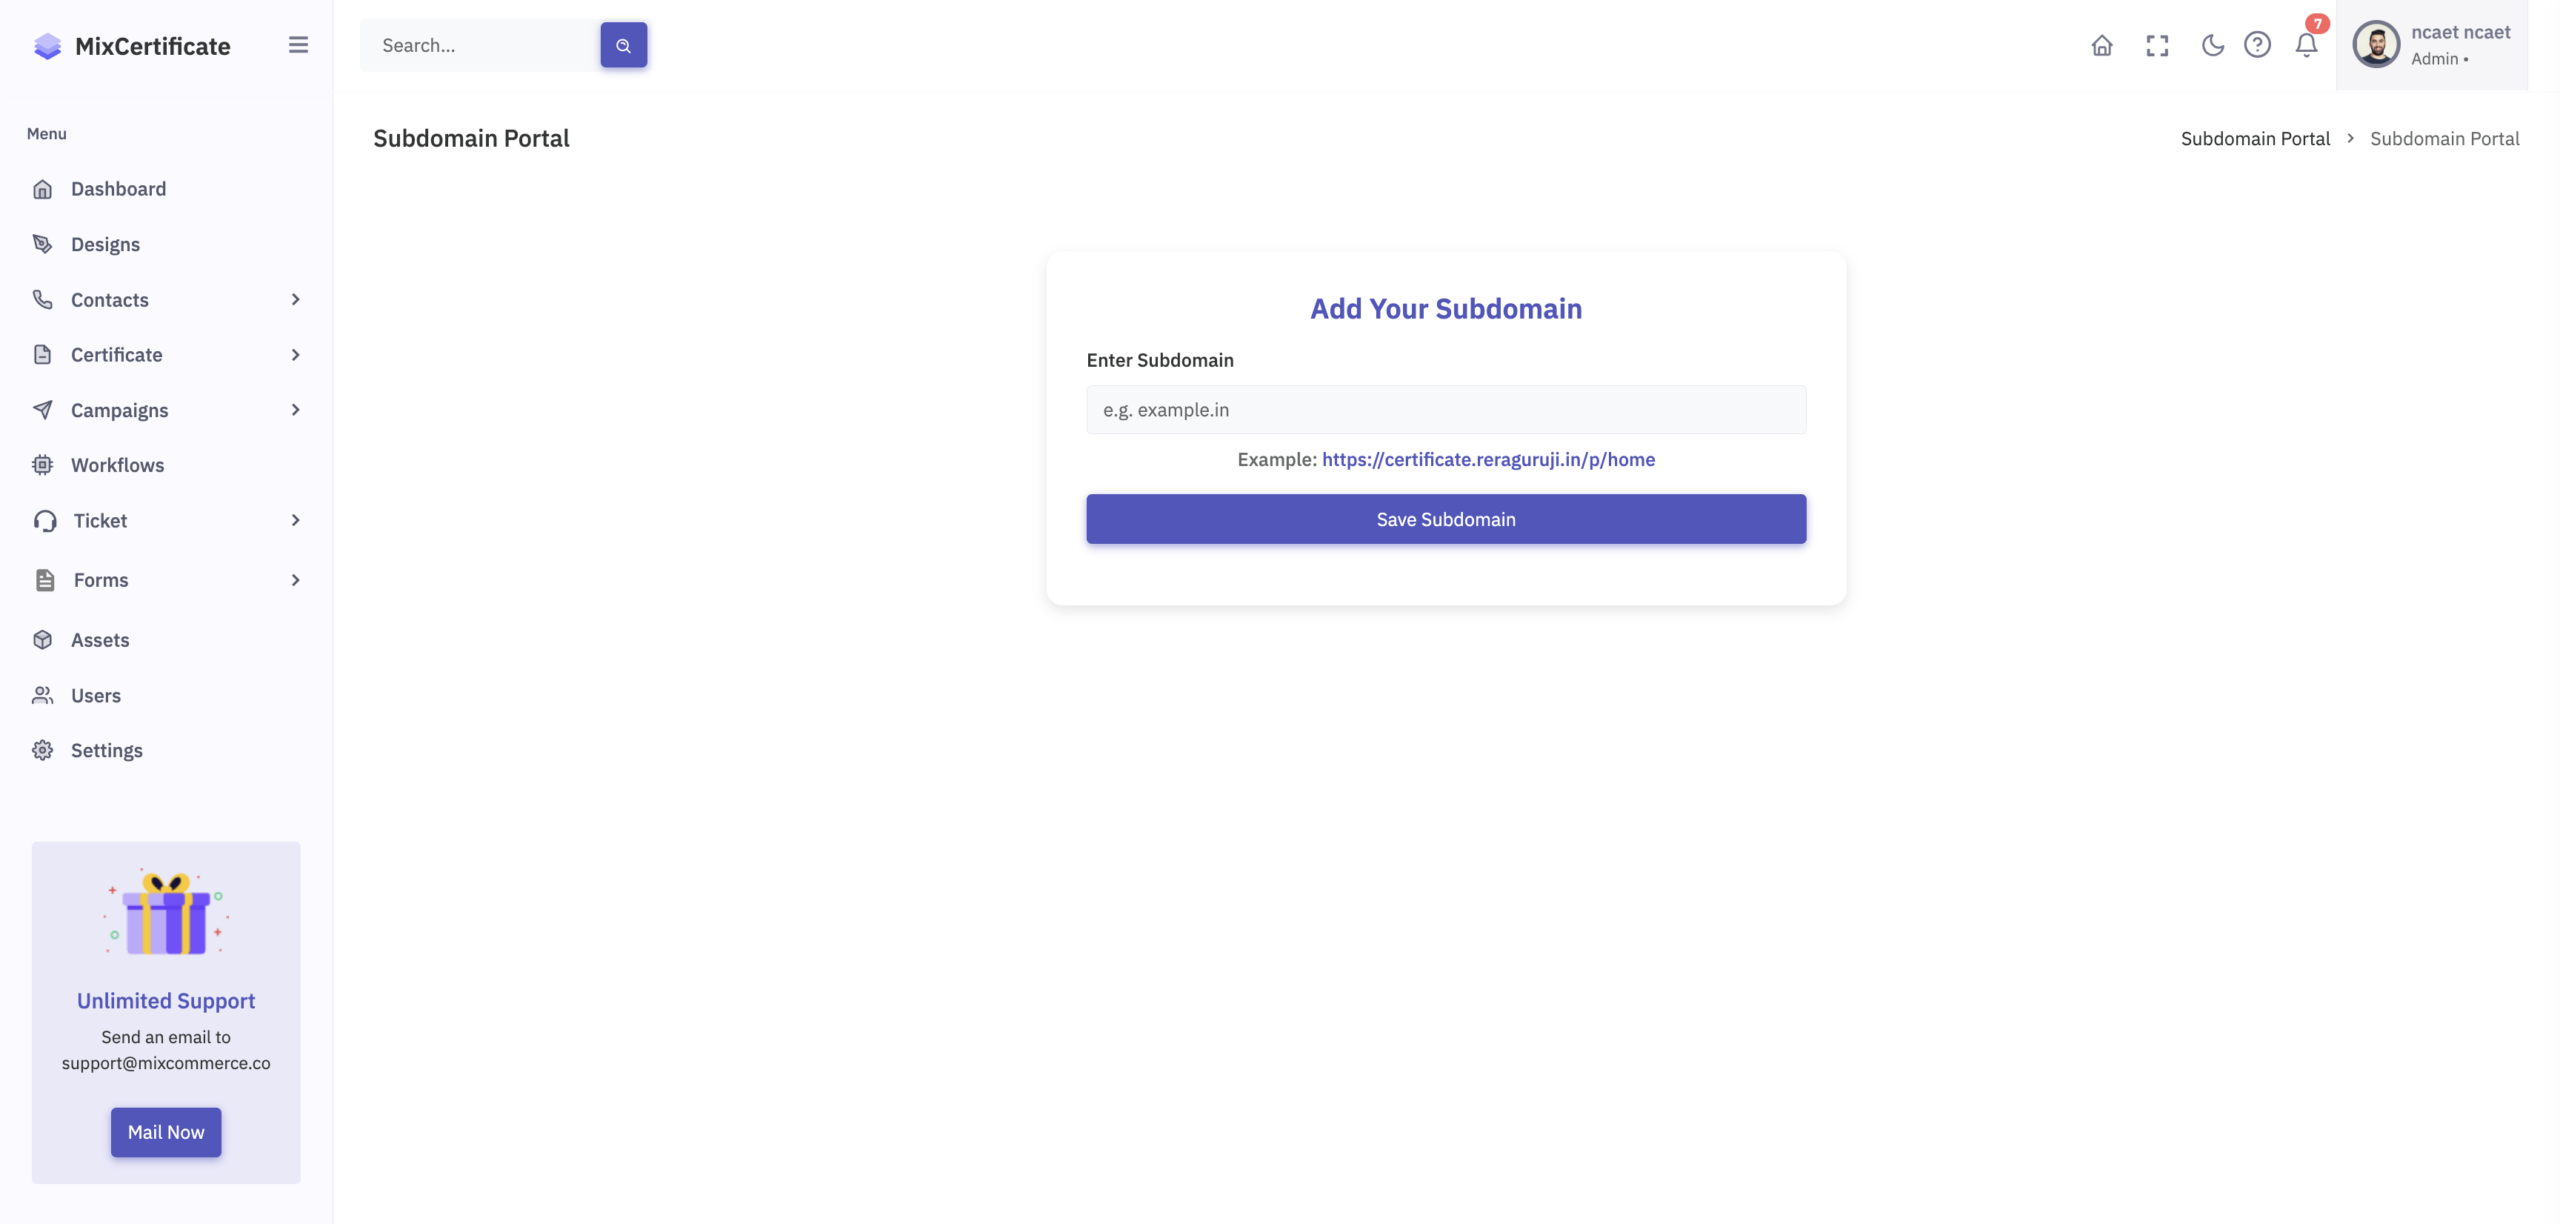
Step 4: Activate the Subdomain in MixCertificate
-
Login to your MixCertificate Admin account
-
Open the Subdomain Settings page:
https://www.mixcertificate.com/settings-subdomain-portal/
-
Enter your custom subdomain:
https://certificate.yourdomain.com
-
Save the settings
Your subdomain is now linked to your MixCertificate account.
Step 5: Test Your Setup
To confirm everything is working:
-
Open the certificate editor
-
Drag and add the Certificate QR Code
-
Generate certificates (bulk or single)
-
Scan the QR code on a generated certificate
-
Verify it opens on:
https://certificate.yourdomain.com
✅ If the QR redirects correctly, your setup is complete.
Important Information
-
Existing certificates will continue to work on the old URLs
-
Only newly generated certificates will use the new subdomain
-
There is no impact on previously issued certificates
Need Help?
If you face any issues during setup, please contact MixCertificate Support with:
-
Your domain name
-
Screenshot of DNS settings (if applicable)
We’ll be happy to assist you.
